

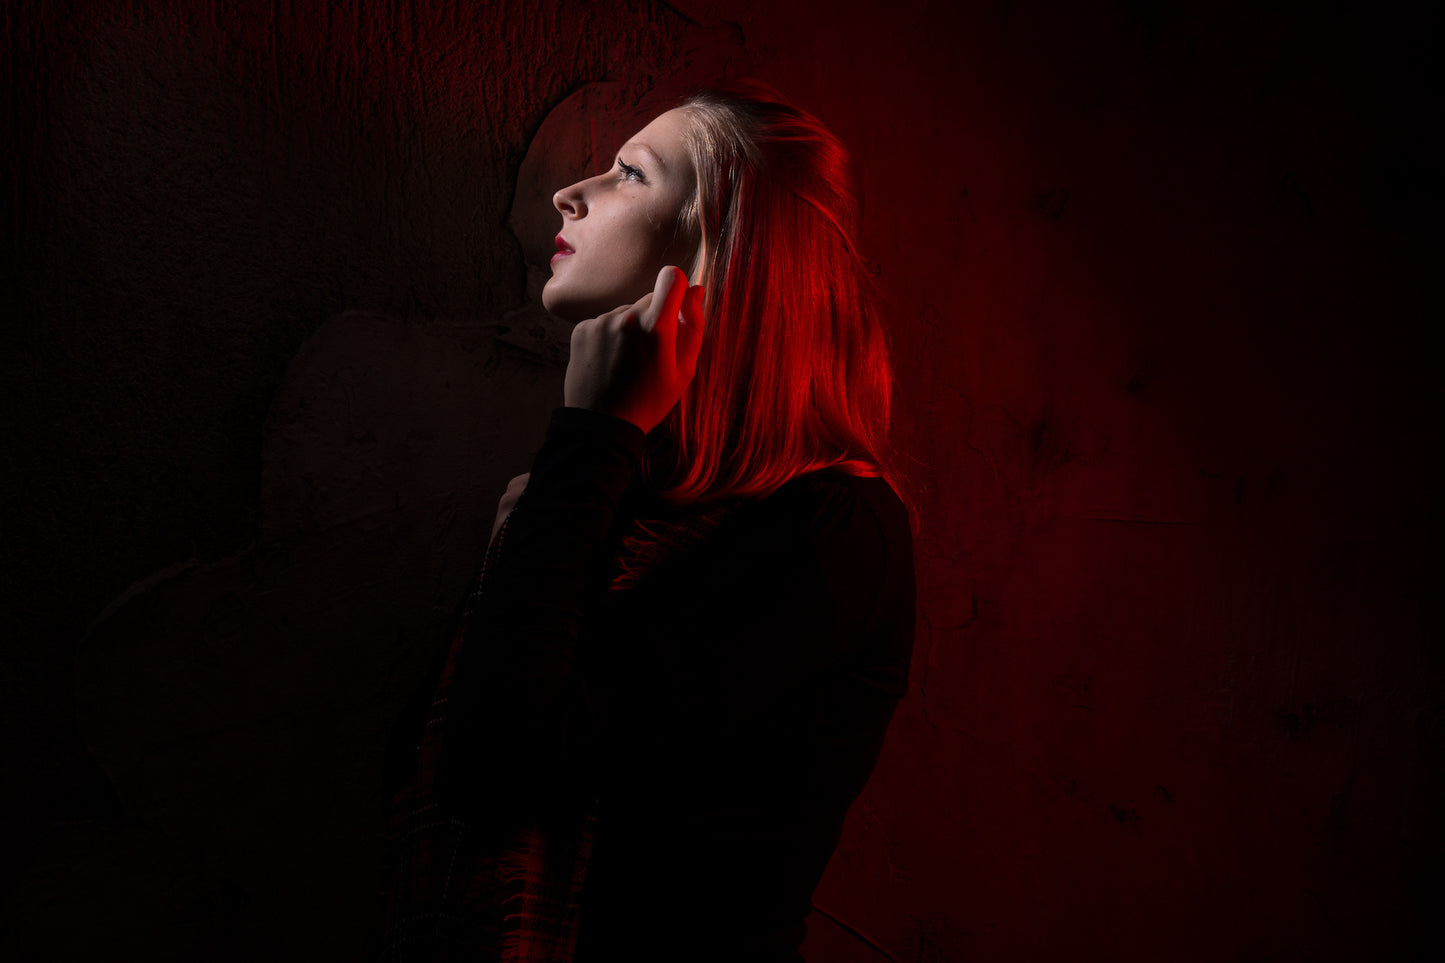
Let's dive in how to create a striking and high contrast image while introducing a little creative color. We're only going to use two speedlights, a few modifiers, and some creative angles to capture this portrait!
Our first light is going to be set up 90 degrees to camera left, that we we have room to move around to increase and decrease contrast. In addition this will create dimension on our subject's face. You can see this technique demonstrated in an earlier blog post and video with one speedlight. Using the Rogue FlashBender 2 XL Pro Lighting System, the XL Reflector specifically, we can block the light from illuminating too much of the background and the large surface area close to our subject's face provides a soft light.

Our second light is going to fill in shadows created by the main light on the opposite side. We're going to modify this fill light with another XL Pro Lighting System, this time with the Strip Grid attachment. This attachment will provide us with a soft light, but directional so to keep unwanted light off of our subject's face. Additionally, to spice this fill light up, we'll add a red gel from the Rogue Flash Gel: Combo Filter Kit to make it a different color.


With that we can now move around the subject to change the whole look of the image by changing the contrast and changing the pose!
Resulting Images:


Camera Settings: 24-70 lens @ 45mm, ISO 200, 1/125, f/9