

Far too many photographers waste countless hours correcting images in post production but it could easily be avoided if they simply spent a few seconds on the basics before pressing the shutter button.
When an image is properly exposed and White Balanced the rest of your digital workflow will be straightforward and above all consistent, so everything will look great and make sense no matter how your images are used later on.

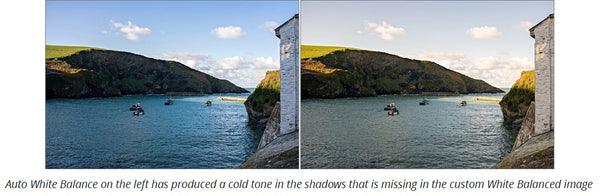
A neutral White Balance sets the base colour temperature for the scene, so greys lose any colour bias, while whites remain clean without hints of magenta or blue for example. The auto White Balance facility on your camera is restricted in range and easily fooled, so it cannot be relied on in tricky conditions or where consistency is important with a series of images.
Fortunately, the ExpoDisc allows us to set an accurate White Balance in just a few seconds but unlike a traditional grey card it can be used in all weather and cleverly combines light sources from every direction, so it won’t be easily misled by tricky conditions.

To use the ExpoDisc you move to the position of the subject, while facing back towards the main light source. Now take a photo with the filter in place at the correct exposure, which should be calculated automatically if you are shooting in aperture or shutter priority mode. The filter can now be removed as you navigate to the custom White Balance menu on your camera and select that image as the source for the White Balance setting.
Finally, you press the WB button on the back of the camera to ensure it is set as the custom White Balance, which will automatically use the most recently selected custom White Balance that you have just set. This last step is important otherwise you could still find yourself working with the auto White Balance or some other preset. This procedure might vary slightly on your camera but should be similar.
It is particularly important to set an accurate White Balance if you are shooting Jpeg since the files are highly vulnerable to damage, such as image banding following small tonal changes in post production. Personally I always shoot in Raw mode but set a custom White Balance for various reasons:
- It reassures clients as images are imported onto the computer if the colour balance is already correct.
- The camera data travels with the Raw file, so they already have the correct White Balance if supplied to others.
- It saves time looking for a neutral reference point later in post production.
- The preview on the camera LCD is a JPEG and it will be most accurate with a custom White Balance.
When the images are imported onto your computer they will now look correct from the outset and assuming your display is accurately calibrated the images should perfectly reflect the subject as it appeared when you pressed the shutter button. Instead of taking hours to randomly edit your images you can be ready for print or web in a few minutes.
Setting an accurate White Balance is a critical part in any colour managed workflow as explained in my new book Colour Management Pro that took more than three years to complete. Covering 620 pages with added HD video tutorials and bonus materials the book is targeted at making colour management both simple and practical for photographers.
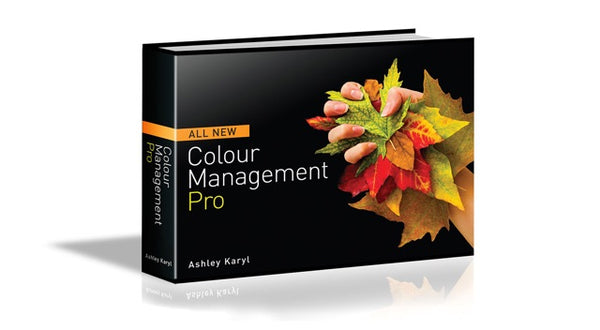
The book starts with techniques for shooting to achieve great colour then moves on to other areas, such as creating the perfect work environment, device calibration and choosing the right settings for software including Photoshop, Elements, Lightroom, Capture One Pro and Pixelmator.
The book by Ashley Karyl is really excellent and I decided to buy an ExpoDisc after reading the chapter on setting the white balance. My color is so much better now!!